Sunny and 80 plus degrees today here in South Central PA so I thought I would take advantage of the weather and build a new raised bed for asparagus. I am making my bed 8 by 3ft and 6 inches deep so I went to the local box store and picked up 3- 2 by 8's that are 6 inches wide. They cut one into 3ft pieces per my request at no charge. I use untreated pine boards so I don't have to worry about chemicals leaching into the soil.
I predrilled three holes at each end on the outside of the 8ft boards and then preceded to screw them to the 3ft pieces to form my box. I found a level, sunny spot to place the bed and loosened the ground underneath then filled it with 1 part compost, 1 part peat moss and 1 part vermiculite.
Planting asparagus crowns is different then planting seeds or plants. You need to dig a trench around 8 inches deep in rows that are 4ft apart but since I am limited in my bed I made the trenches around 6 inches deep and 8 inches apart. Lay the asparagus crowns in the bottom of the trench by spreading the roots out and sitting the crown up. Cover with 2-3 inches of soil. After the asparagus emerges in the furrow, gradually fill and cover the vegetation. Eventually the furrow should be level with the surrounding soil.
You don't always get asparagus the first year and if you do it is suggested that you only harvest lightly and so on with each year until the 4th to 6th year. All of these instructions are on the package that I purchased at my local garden center.
I am planting as many prennial fruits and vegetables in my backyard garden as space allows so I can enjoy the benefit of my labor for years to come. If you like asparagus you may want to give it a try.
Happy Gardening!
This blog is about my backyard organic gardening, harvesting and recipes. What works and doesn't work. Indoor and outdoor vegetable gardening and my backyard birds.
Monday, April 11, 2011
Thursday, April 7, 2011
Planting Peas and Brussel Sprouts
It is a beautiful day here in South Central PA so I decided to plant my second round of peas. I am amending the soil with Azomite rock minerals. It is suppose to help boost the minerals in the vegetables according to growingyourgreens.com. I follow John on his channel and have learned many useful gardening tips from him.
You may want to try a nylon trellis for your peas. This is the third season for mine. It works really well and has held up to the outside elements.
It is time to put out your brassica family plants if you haven't already. I am trying my hand at brussel sprouts this year. Hopefully with six plants I should reap a good yield.
When planting vegetable starts I like to dig a trench the depth of the root ball. Lay the plant on its side and cover with soil. Stand the plant up and then push the soil around the other side. I think this method helps eliminate any air pockets around the root system which could cause a puddle of water resulting in root rot.
Always be sure to give your transplant a good soaking so the root system can take hold in its new environment.
Happy Gardening!
You may want to try a nylon trellis for your peas. This is the third season for mine. It works really well and has held up to the outside elements.
It is time to put out your brassica family plants if you haven't already. I am trying my hand at brussel sprouts this year. Hopefully with six plants I should reap a good yield.
When planting vegetable starts I like to dig a trench the depth of the root ball. Lay the plant on its side and cover with soil. Stand the plant up and then push the soil around the other side. I think this method helps eliminate any air pockets around the root system which could cause a puddle of water resulting in root rot.
Always be sure to give your transplant a good soaking so the root system can take hold in its new environment.
Happy Gardening!
Tuesday, April 5, 2011
Gardening with Garbage
Reduce, Reuse, Recycle!! Garbage is an inexpensive way to garden inside and out. I have been reusing food containers to start seeds and to grow vegetable plants in for several years.
I have used all sorts of food containers in the past and still use certain sizes for starting my seeds or container gardening outside. I go to a local restaurant to get free 5 and 3 gallon buckets for growing my peppers, tomatoes, squash etc. I have been using the milk jug containers for a birdseed scoop and a cover to protect seedlings from frost. Just cut the bottom off and there you have it. Comes with it's own built in handle!
Today I am using an aluminum pie pan to start my marigold and cardinal climber seeds. I have also used the 1 lb deli container, bulk salad container(my favorite), juice jugs, produce containers that berries or tomatoes come in and many more similar type containers including large plastic to go cups from your local fast food restaurant. Use the lids to create a mini greenhouse.
I have used all sorts of food containers in the past and still use certain sizes for starting my seeds or container gardening outside. I go to a local restaurant to get free 5 and 3 gallon buckets for growing my peppers, tomatoes, squash etc. I have been using the milk jug containers for a birdseed scoop and a cover to protect seedlings from frost. Just cut the bottom off and there you have it. Comes with it's own built in handle!
Today I am using an aluminum pie pan to start my marigold and cardinal climber seeds. I have also used the 1 lb deli container, bulk salad container(my favorite), juice jugs, produce containers that berries or tomatoes come in and many more similar type containers including large plastic to go cups from your local fast food restaurant. Use the lids to create a mini greenhouse.
Just be sure that you wash throughly and punch holes in the bottom for adequate drainage. Once you start to look at these containers as growing pots, you will find that the selection is endless. You may want to save yourself some $$ while helping the environment and give it a try.
Happy Gardening!
Friday, April 1, 2011
Onion Snow
Well, this morning we woke up to a few inches of snow and when it snows in the spring my grandfather use to say that it was an onion snow. For those of you who have planted onions you may know this already and for those of you who don't there is a very simple explanation.
An onion snow is when it snows after the spring onions start to sprout through the soil. I am just wondering if it counts when your onions are growing in a covered raised bed too! Either way here it is........Onion snow!
Happy Gardening!
Wednesday, March 30, 2011
Nesting Materials for the Birds
For the past several years I have been putting out dog fur for my backyard birds. It is a joy to watch my feathered friends gather our golden retrievers fur for their nests. I have seen tufted titmice, black capped chickadees, goldfinch, and even an oriole tugging away at the fur.
If you don't have any dog fur of your own, you may want to stop by a local groomer and request a bagful. Our groomer is more than happy to give fur away. If that isn't an option, you could gather some old string pieces, yarn, raffia or ribbon. Robins love the larger materials so anything that is "string like" would work.
Stuff your nesting materials in a container that has openings. I use an old wire planter and a suet cage that I hang out on a shepherds hook. You could also hang it on a nearby tree or shrub. Make sure it is close by so you can watch all the fun.
Happy Birdwatching!
If you don't have any dog fur of your own, you may want to stop by a local groomer and request a bagful. Our groomer is more than happy to give fur away. If that isn't an option, you could gather some old string pieces, yarn, raffia or ribbon. Robins love the larger materials so anything that is "string like" would work.
Stuff your nesting materials in a container that has openings. I use an old wire planter and a suet cage that I hang out on a shepherds hook. You could also hang it on a nearby tree or shrub. Make sure it is close by so you can watch all the fun.
Happy Birdwatching!
Tuesday, March 29, 2011
Transplanting Tomato and Pepper Starts
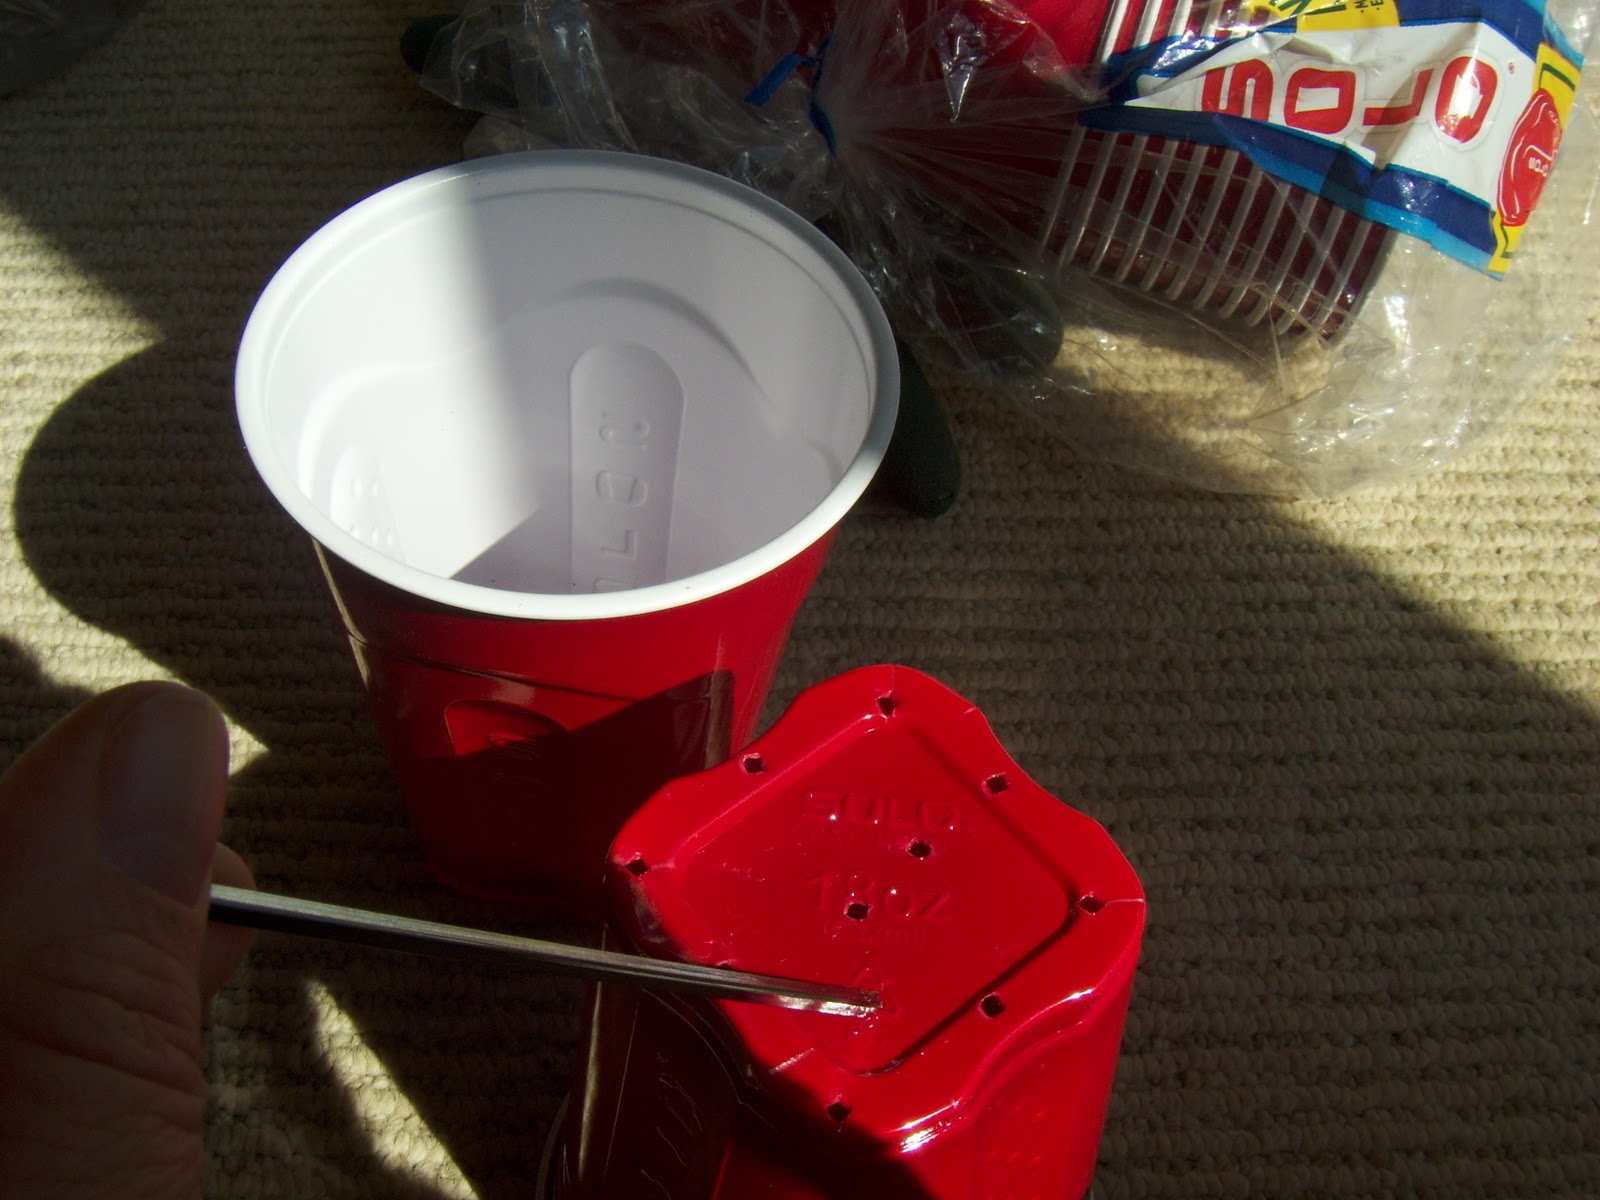
My tomato and pepper plants are getting too long and leggy for the starter cells so I decided to transplant them into a solo cup. You could use any type of container but I find that these cups are the perfect size for these transplants. From the cup I will transplant into my raised bed garden in the beginning of May.
I punched some holes in the bottom for drainage and added my soil mix of 1 part compost, 1 part peat moss, 1 part vermiculite.
When transplanting tomatoes, I am burying them deeper into the cup and filling the soil up to the leaves. As they grow I will add more soil mix. This will make the root system stronger. The pepper plants will be transplanted the same way.
Don't forget to mark your cups with name of the plant. Very frustrating to try and remember what type of tomato or pepper you transplanted. Also, I am setting the cups on a tray to catch the excess water and making it easier to move into the sun. Starting tomorrow I will be placing the tray into the direct sun for an hour or two and gradually building up to a full day of sun.
I will still be placing the trays on the rope lights at night for warmth. So far so good....time will tell whether or not the transplants were successful.
Starting seeds is a great way to grow a variety of plants that you may not be able to get at a nursery.
Happy Gardening!
I punched some holes in the bottom for drainage and added my soil mix of 1 part compost, 1 part peat moss, 1 part vermiculite.
When transplanting tomatoes, I am burying them deeper into the cup and filling the soil up to the leaves. As they grow I will add more soil mix. This will make the root system stronger. The pepper plants will be transplanted the same way.
Don't forget to mark your cups with name of the plant. Very frustrating to try and remember what type of tomato or pepper you transplanted. Also, I am setting the cups on a tray to catch the excess water and making it easier to move into the sun. Starting tomorrow I will be placing the tray into the direct sun for an hour or two and gradually building up to a full day of sun.
I will still be placing the trays on the rope lights at night for warmth. So far so good....time will tell whether or not the transplants were successful.
Starting seeds is a great way to grow a variety of plants that you may not be able to get at a nursery.
Happy Gardening!
Thursday, March 24, 2011
Update on HoopHouse and Indoor Seed Starts
Just a quick update on the progress of the indoor seed starts and the hoophouse seedlings. Everything is going well and the hoophouse is up just in time for a cold spell we are having this week here in South Central PA.
The indoor/outdoor rope lights are working very well to heat the seedlings. The peppers, basil and tomatoes seem to like the heat. I do notice that I am watering more often but I guess that is to be expected. I did add a piece of aluminum foil over the light for reflection and I am rotating the tray every other day.
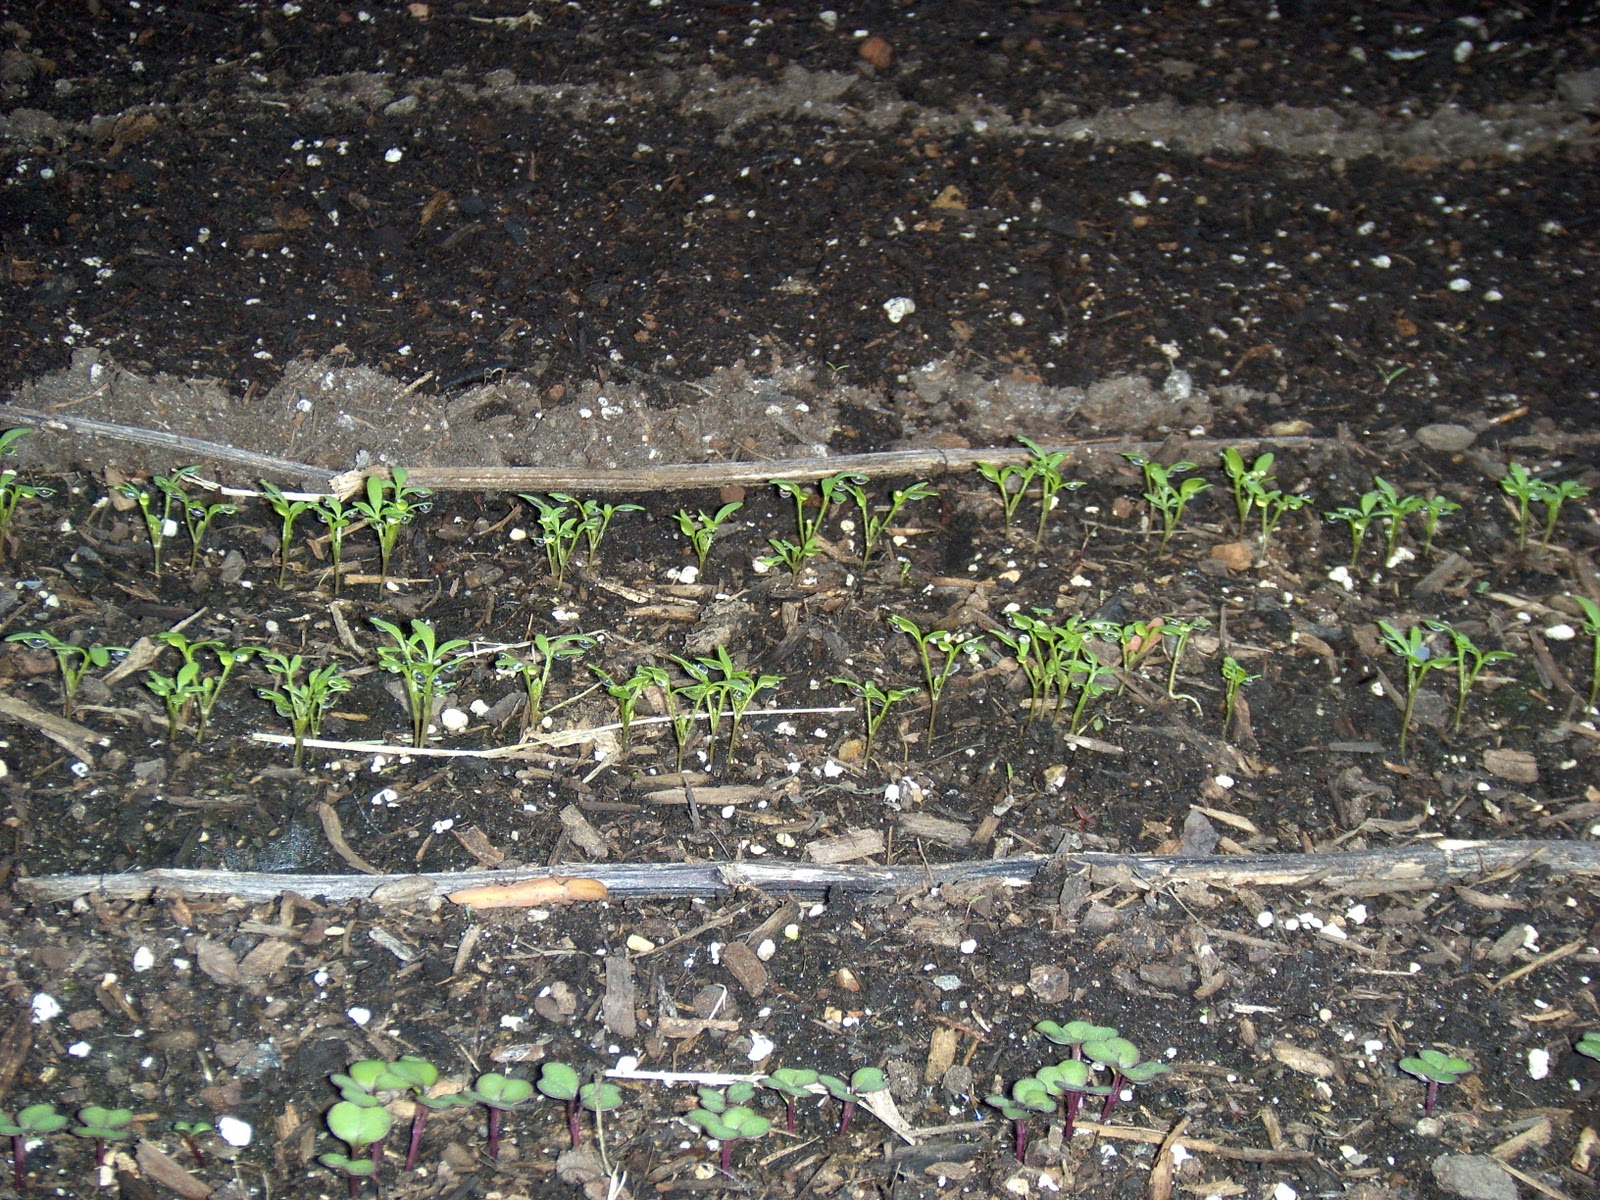
The seedlings in the hoophouse are doing very well. I have watered only when needed to keep soil moist. Also, have been opening the ends and sides when the temperature gets up over 50 degrees. The air circulation is needed to prevent mold and/or stem rot, otherwise it would be too wet.
As you can see from the photos, the lettuce and spinach (started indoors) are growing fast and I see kale, swiss chard, arugula, bok choi and pak choi coming up.
I hope you are enjoying the new gardening season.
Happy Gardening!
The indoor/outdoor rope lights are working very well to heat the seedlings. The peppers, basil and tomatoes seem to like the heat. I do notice that I am watering more often but I guess that is to be expected. I did add a piece of aluminum foil over the light for reflection and I am rotating the tray every other day.
The seedlings in the hoophouse are doing very well. I have watered only when needed to keep soil moist. Also, have been opening the ends and sides when the temperature gets up over 50 degrees. The air circulation is needed to prevent mold and/or stem rot, otherwise it would be too wet.
As you can see from the photos, the lettuce and spinach (started indoors) are growing fast and I see kale, swiss chard, arugula, bok choi and pak choi coming up.
I hope you are enjoying the new gardening season.
Happy Gardening!
Subscribe to:
Posts (Atom)